Evaporator Coil Cleaning for Peak AC Performance
Dirty evaporator coils force air conditioning systems to work harder, and that extra strain raises energy bills while weakening cooling comfort. At Affordable Air, we recommend removing loose debris with a soft brush or compressed air, then applying a specialized coil cleaner or mild detergent, followed by a gentle water rinse. We find that homeowners can safely handle light cleaning themselves, while we step in to protect delicate fins and restore full efficiency whenever buildup is heavier.
Why Does A Dirty Evaporator Coil Hurt Performance?
A dirty evaporator coil blocks the heat transfer that keeps household air cool. Dirt, dust, and debris buildup on coils can significantly impair cooling efficiency and even cause a full system breakdown. Once that grime coats the coil surface, the refrigerant inside struggles to absorb heat from the air passing over it, forcing the whole system to work harder for weaker results.
We see the fallout in homes across Heber Springs, AR every summer. A system that once cooled comfortably may suddenly run longer, struggle to hold a set temperature, or push energy bills noticeably higher than expected. Left unaddressed, this strain shortens equipment life and raises the odds of an unplanned repair call.
How Do I Know My Coil Needs Cleaning?
Watch for warm air from vents, longer run cycles, or a spike in the electric bill despite normal usage. These are classic signs of restricted airflow across a grimy coil. We recommend a visual inspection whenever cooling performance feels off, since catching buildup early prevents bigger repairs later.
If we suspect coil buildup is behind a performance drop, our process typically follows these steps:
We inspect the coil and airflow path for visible dust, dirt, or debris. This first look tells us whether the problem is likely cosmetic or something deeper in the system.
We confirm the diagnosis with airflow and temperature readings across the coil. These readings give us hard numbers instead of guesswork, so any fix we recommend is grounded in the system’s real performance.
We perform evaporator coil cleaning to strip away buildup safely. We choose the cleaning method and pressure based on how the coil and fins are holding up.
We test the system’s cooling output and energy draw after service. This confirms the cleaning actually restored performance rather than just appearances.
We inspect the coil and airflow path for visible dust, dirt, or debris. This first look tells us whether the problem is likely cosmetic or something deeper in the system.
We confirm the diagnosis with airflow and temperature readings across the coil. These readings give us hard numbers instead of guesswork, so any fix we recommend is grounded in the system’s real performance.
We perform evaporator coil cleaning to strip away buildup safely. We choose the cleaning method and pressure based on how the coil and fins are holding up.
We test the system’s cooling output and energy draw after service. This confirms the cleaning actually restored performance rather than just appearances.
We founded Affordable Air to help homeowners in Heber Springs, AR pinpoint coil-related performance loss before it turns into a full breakdown. Routine AC coil maintenance protects both comfort and equipment life. Our customers have told us that we take the time to explain simple steps they can take at home to help clean AC coils and keep the system running smoothly between visits.
What Tools And Safety Steps Come First?
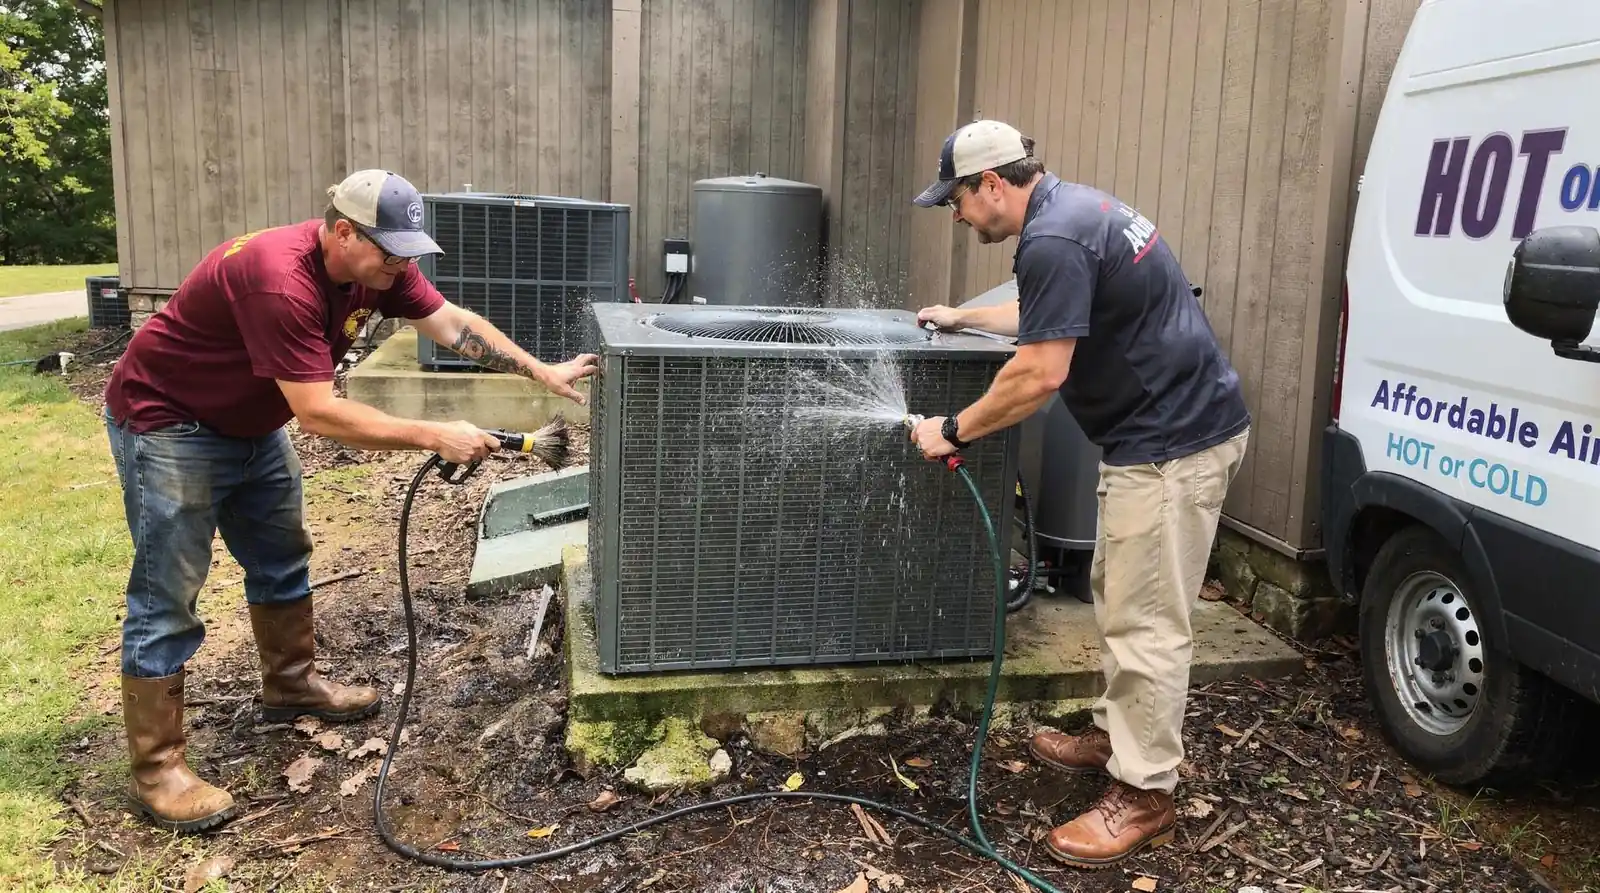
Proper preparation determines whether clean AC coils stay undamaged during the process. Before touching the unit, we gather a soft-bristle brush, compressed air, a specialized coil cleaner or mild detergent solution, and a low-pressure water source. Skipping preparation risks bent fins, trapped moisture, and a system that runs harder than before. We recommend homeowners follow this sequence for safe, effective AC coil maintenance:
Shut off power to the outdoor unit at the disconnect switch or breaker. This single step prevents the fan or compressor from starting unexpectedly while the panel is open.
Remove the protective panel to expose the coil surface. Set the screws aside in one place so reassembly goes quickly once cleaning is finished.
Clear loose debris with a soft brush or compressed air before applying any cleaner. Skipping this step lets grit scratch the fins once liquid cleaner is introduced.
Apply the coil cleaner or mild detergent solution evenly across the coil fins. Even coverage keeps the cleaner from pooling in one spot and risking the insulation nearby.
Let the solution sit according to the product’s instructions. This dwell time is what actually loosens embedded grime, so rushing past it undercuts the whole process.
Rinse gently with water, keeping pressure low to protect delicate fins. A garden hose on a gentle setting is usually enough; a pressure washer is not.
Reassemble the panel and restore power once everything is dry. Restoring power to a still-wet coil risks trapping moisture that encourages mold growth.
Shut off power to the outdoor unit at the disconnect switch or breaker. This single step prevents the fan or compressor from starting unexpectedly while the panel is open.
Remove the protective panel to expose the coil surface. Set the screws aside in one place so reassembly goes quickly once cleaning is finished.
Clear loose debris with a soft brush or compressed air before applying any cleaner. Skipping this step lets grit scratch the fins once liquid cleaner is introduced.
Apply the coil cleaner or mild detergent solution evenly across the coil fins. Even coverage keeps the cleaner from pooling in one spot and risking the insulation nearby.
Let the solution sit according to the product’s instructions. This dwell time is what actually loosens embedded grime, so rushing past it undercuts the whole process.
Rinse gently with water, keeping pressure low to protect delicate fins. A garden hose on a gentle setting is usually enough; a pressure washer is not.
Reassemble the panel and restore power once everything is dry. Restoring power to a still-wet coil risks trapping moisture that encourages mold growth.
Can I Damage My AC Coils While Cleaning Them?
Yes, aggressive rinsing or scrubbing bends the thin aluminum fins that clean coils depend on for airflow. High-pressure water is the most common cause of accidental damage during home cleaning attempts. We always rinse gently, never with a pressure washer, to keep evaporator coil cleaning results consistent without harming the coil structure.
Do I Need Professional Tools For This Job?
Basic debris removal works fine with household tools. Deeper coil work benefits from equipment most homeowners do not keep on hand. We stay current on the latest cleaning methods and equipment so every visit reflects current best practice. For homeowners in Heber Springs, AR who are unsure which tools or supplies fit their system, we welcome a call before any cleaning attempt begins.
How Do You Safely Access The Evaporator Coil?
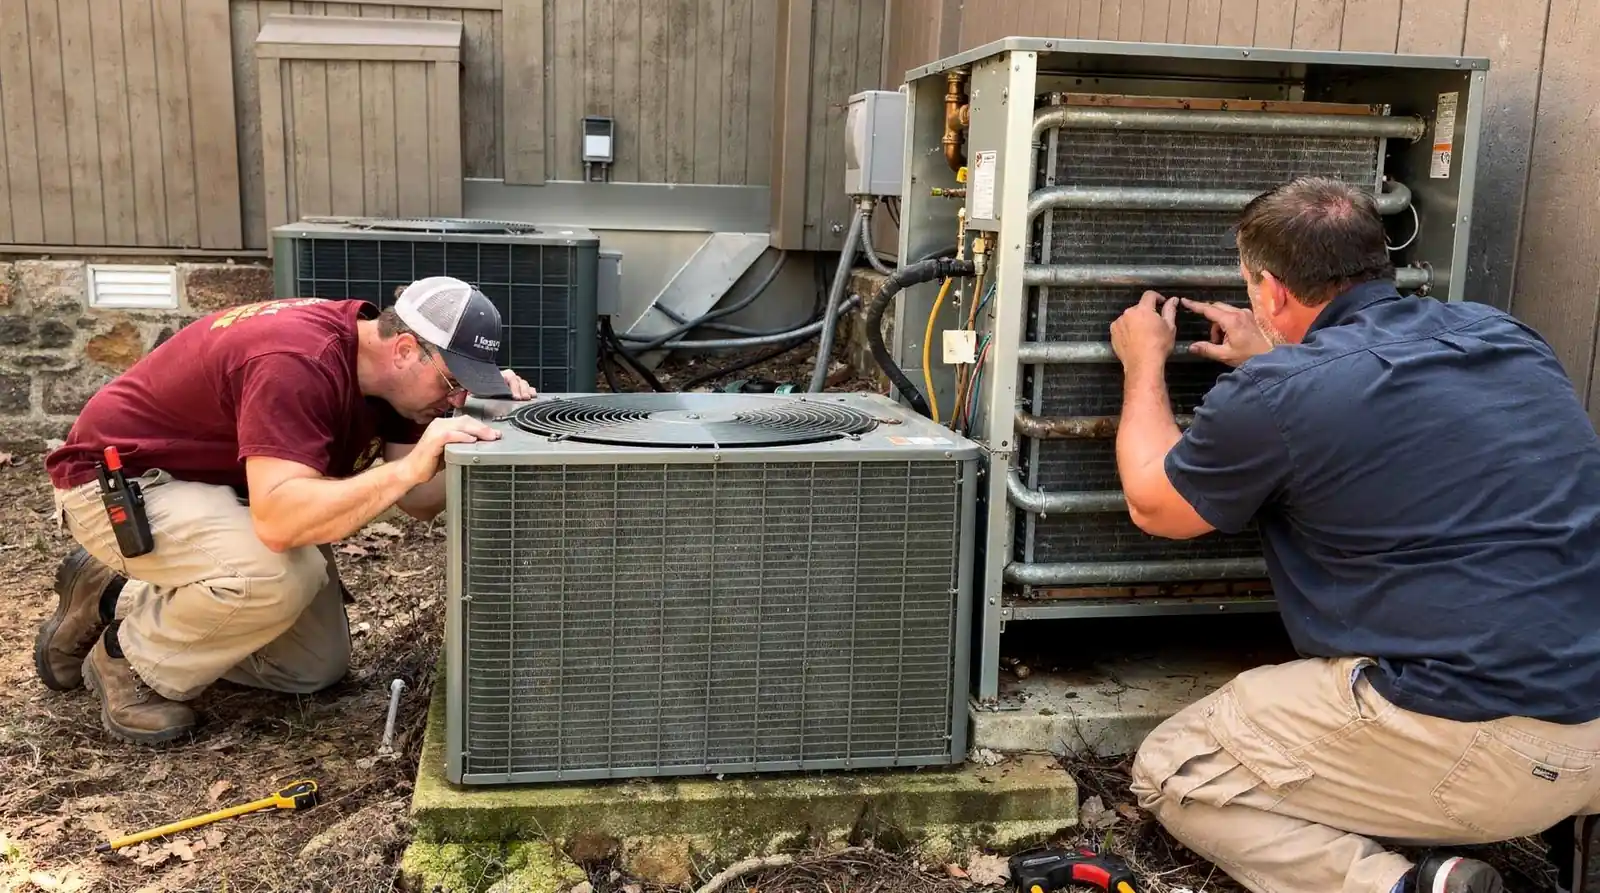
Safe access starts with locating the correct coil. The evaporator and condenser coils sit at opposite ends of the cooling process, and confusing the two wastes effort and risks opening the wrong panel on the system. We walk homeowners through this process step by step, so evaporator coil cleaning happens without damage to surrounding parts.
Shut off power to the air handler at the breaker before touching any panel. This protects against electrical shock and keeps the blower from starting while the cabinet is open.
Locate the air handler or furnace cabinet, since the evaporator coil sits inside this unit rather than outside near the compressor. Opening the wrong cabinet outdoors wastes time and does nothing for a dirty indoor coil.
Remove the access panel screws and set them aside in one place. Keeping the hardware together avoids a search for missing screws once cleaning is done.
Slide the panel free carefully, watching for the coil fins just behind it. The fins sit close to the opening, so a rushed motion here is where accidental bending most often happens.
Inspect the coil surface and surrounding insulation for visible dirt, mold, or moisture before applying any cleaning product. This inspection tells us whether we are looking at routine dust or a deeper moisture problem that needs a different fix.
Shut off power to the air handler at the breaker before touching any panel. This protects against electrical shock and keeps the blower from starting while the cabinet is open.
Locate the air handler or furnace cabinet, since the evaporator coil sits inside this unit rather than outside near the compressor. Opening the wrong cabinet outdoors wastes time and does nothing for a dirty indoor coil.
Remove the access panel screws and set them aside in one place. Keeping the hardware together avoids a search for missing screws once cleaning is done.
Slide the panel free carefully, watching for the coil fins just behind it. The fins sit close to the opening, so a rushed motion here is where accidental bending most often happens.
Inspect the coil surface and surrounding insulation for visible dirt, mold, or moisture before applying any cleaning product. This inspection tells us whether we are looking at routine dust or a deeper moisture problem that needs a different fix.
Do I need to inspect the area before cleaning?
Yes. We perform a thorough inspection before any service work to confirm the coil area is ready and safe to open, as we do across our heating and cooling visits. This step verifies wiring, refrigerant lines, and drain pans sit clear of the workspace. Skipping this check raises the odds of nicking a line or missing standing water that signals a larger drainage problem.
What if I’m not sure how to reach the coil myself?
Not every cabinet layout is the same, and some access panels sit behind ductwork that shouldn’t be forced open. We schedule inspections for homeowners in Heber Springs, AR who feel unsure about opening their system safely. Our team confirms the coil location, checks the surrounding components, and handles the panel removal so nothing gets bent or disconnected.
Once the panel comes off and the coil is visible, AC coil maintenance can move to the actual cleaning stage. Getting the access step right protects the rest of the system and sets up every later step to clean AC coils without added risk.
How Do You Clean The Evaporator Coil Step-By-Step?
Cleaning the evaporator coil follows a specific order: clear debris first, treat the coil surface second, rinse last. Skipping steps or rushing the process risks bent fins and reduced airflow, which drives cooling loss and higher energy bills. Before starting, homeowners need access to the indoor air handler, a soft-bristle brush or can of compressed air, a specialized coil cleaner or mild detergent solution, and a spray bottle for rinsing.
We recommend the following order for evaporator coil cleaning:
Shut off power to the system at the breaker before opening any panels. This is the same safety step we follow on every visit, no matter how light the buildup looks.
Remove the access panel covering the evaporator coil. Setting it aside carefully avoids scratches or dents that would make reassembly harder.
Clear loose dust and debris from the coil using a soft brush or compressed air. This step alone resolves a surprising amount of the airflow loss homeowners notice.
Apply a specialized coil cleaner or mild detergent solution across the coil surface. Even, light coverage works better than saturating one section and leaving another dry.
Let the solution sit briefly so it can loosen embedded grime. Cutting this step short means more scrubbing is needed later, which raises the risk of fin damage.
Rinse gently with water, avoiding high-pressure spray that can bend the delicate aluminum fins. A slow, steady rinse clears the loosened grime without stressing the coil.
Allow the coil to air-dry fully before reassembling the panel and restoring power. Sealing up a still-damp coil invites the mold and moisture problems we try hard to avoid.
Shut off power to the system at the breaker before opening any panels. This is the same safety step we follow on every visit, no matter how light the buildup looks.
Remove the access panel covering the evaporator coil. Setting it aside carefully avoids scratches or dents that would make reassembly harder.
Clear loose dust and debris from the coil using a soft brush or compressed air. This step alone resolves a surprising amount of the airflow loss homeowners notice.
Apply a specialized coil cleaner or mild detergent solution across the coil surface. Even, light coverage works better than saturating one section and leaving another dry.
Let the solution sit briefly so it can loosen embedded grime. Cutting this step short means more scrubbing is needed later, which raises the risk of fin damage.
Rinse gently with water, avoiding high-pressure spray that can bend the delicate aluminum fins. A slow, steady rinse clears the loosened grime without stressing the coil.
Allow the coil to air-dry fully before reassembling the panel and restoring power. Sealing up a still-damp coil invites the mold and moisture problems we try hard to avoid.
This same clean AC coils sequence applies whether the coil sits in an attic unit, a closet air handler, or a basement furnace cabinet.
Can homeowners clean the evaporator coil themselves?
Homeowners can handle light, surface-level cleaning on accessible coils without much trouble. Reaching deep grime or straightening bent fins safely calls for professional tools and a trained eye, since the fins bend and tear easily. We view AC coil maintenance as a shared job: simple upkeep at home, and deeper cleaning left to a service visit.
Why does a professional visit matter for coil cleaning?
A professional visit protects the fins from damage while restoring full system efficiency. We walk homeowners through simple steps they can repeat between service visits, turning a repair call into a lasting maintenance habit. Affordable Air has long served as a dependable HVAC resource for homeowners in Heber Springs, AR, giving them a trusted place to turn for coil guidance and hands-on system care.
Foaming Or Non-Foaming: Which Cleaner Should You Choose?
Foaming cleaners work best on evaporator coil cleaning jobs because the foam expands into tight fin spacing and lifts embedded dirt without heavy scrubbing. Non-foaming, liquid cleaners suit exterior condenser coils, where rinsing with a hose after application washes contaminants straight out.
Choosing the wrong product wastes effort and risks damaging delicate aluminum fins. We recommend homeowners follow a simple decision process before opening a spray bottle:
Identify the coil location, whether it’s the indoor evaporator or the outdoor condenser unit. The right cleaner for one is often the wrong choice for the other.
Check the soil buildup; heavy grime and mold call for foaming action, while light dust calls for a non-foaming rinse. Matching the product to the buildup keeps us from over-treating a coil that only needed a light pass.
Confirm airflow clearance around the coil so foam expansion doesn’t trap moisture against the cabinet. Trapped moisture is how a cleaning job accidentally creates a mold problem.
Apply the chosen cleaner following label directions, then rinse gently with low water pressure. Rushing the rinse step is one of the most common ways homeowners undo the benefit of a careful cleaning.
Identify the coil location, whether it’s the indoor evaporator or the outdoor condenser unit. The right cleaner for one is often the wrong choice for the other.
Check the soil buildup; heavy grime and mold call for foaming action, while light dust calls for a non-foaming rinse. Matching the product to the buildup keeps us from over-treating a coil that only needed a light pass.
Confirm airflow clearance around the coil so foam expansion doesn’t trap moisture against the cabinet. Trapped moisture is how a cleaning job accidentally creates a mold problem.
Apply the chosen cleaner following label directions, then rinse gently with low water pressure. Rushing the rinse step is one of the most common ways homeowners undo the benefit of a careful cleaning.
AC coil maintenance performed with the correct cleaner type is a critical part of preventing costly repairs. It helps homeowners save money, maintain efficiency, and extend the system’s life expectancy over years of seasonal use.
Can I use foaming cleaner on outdoor coils?
We generally advise against it. Foaming products can trap moisture against outdoor condenser components, encouraging corrosion rather than preventing it.
Should I hire a professional to clean AC coils?
Customers who have compared results describe our work as thorough and dependable, particularly when maintaining or replacing full systems. For homeowners uncertain which product matches their coil type, we welcome a call for direct guidance rather than guesswork.
Skipping this decision entirely and grabbing whatever cleaner sits on the shelf often shortens coil life and drives up cooling costs during peak summer months.
How Do You Clean The Condenser Coil Too?
Cleaning the condenser coil follows the same logic as clean AC coils work on the indoor unit, with a few outdoor-specific steps. The outdoor condenser unit houses the compressor, the condenser coil, and the fan, and this equipment plays a key role in pulling heat out of the outdoor air, much like the cooling equipment we service across our coverage area. When dirt cakes onto that coil, heat transfer suffers and the whole system works harder to reach the same temperature.
We treat AC coil maintenance on the condenser as a seasonal task, ideally before the cooling season peaks. Here’s how we approach it:
Shut off power to the outdoor unit at the disconnect box before touching anything. This keeps the fan and compressor from cycling on while the cabinet is open.
Remove leaves, grass clippings, and loose debris from around and inside the unit’s cabinet. Outdoor units collect yard debris quickly, so this step alone often restores noticeable airflow.
Take off the protective grille or top panel to expose the coil fins. Setting the fasteners aside together makes reassembly faster once cleaning is done.
Rinse the coil gently from the inside out with a garden hose, avoiding high-pressure spray that bends fins. Rinsing from the inside pushes debris back out the way it came in rather than deeper into the coil.
Apply a coil-safe cleaning solution if grime persists, then rinse again and let the unit dry fully. A second rinse ensures no cleaning residue is left behind to attract new dirt.
Reassemble the grille and restore power once everything is dry. Confirming full dryness first protects the electrical components housed nearby.
Shut off power to the outdoor unit at the disconnect box before touching anything. This keeps the fan and compressor from cycling on while the cabinet is open.
Remove leaves, grass clippings, and loose debris from around and inside the unit’s cabinet. Outdoor units collect yard debris quickly, so this step alone often restores noticeable airflow.
Take off the protective grille or top panel to expose the coil fins. Setting the fasteners aside together makes reassembly faster once cleaning is done.
Rinse the coil gently from the inside out with a garden hose, avoiding high-pressure spray that bends fins. Rinsing from the inside pushes debris back out the way it came in rather than deeper into the coil.
Apply a coil-safe cleaning solution if grime persists, then rinse again and let the unit dry fully. A second rinse ensures no cleaning residue is left behind to attract new dirt.
Reassemble the grille and restore power once everything is dry. Confirming full dryness first protects the electrical components housed nearby.
Neglecting this outdoor coil creates the same problem as a dirty indoor coil: dirt buildup on either coil reduces heat transfer and forces the compressor to run longer to satisfy the thermostat. That extra runtime shows up on energy bills long before it shows up as a full breakdown.
Why does the condenser coil get dirtier than the evaporator coil?
The condenser coil sits outdoors, exposed to pollen, grass, dust, and airborne debris that never reach the sealed evaporator coil indoors. We often find outdoor coils need attention more frequently than indoor coils for that reason alone.
Can we skip cleaning the condenser if the evaporator coil looks clean?
No, both coils work together in the same cooling cycle, and a dirty condenser undermines a clean evaporator coil’s performance. Homeowners in Heber Springs, AR can reach out to us whenever they’d rather have both coils checked and cleaned by a professional than tackle the job solo.
Should You DIY Or Hire A Professional?
Surface-level cleaning suits most homeowners; deeper AC coil maintenance calls for a trained hand. Superficial dust removal on exposed coil surfaces poses little risk, but the fins behind them bend and tear easily under too much pressure or the wrong cleaning solution. That’s the line between a Saturday afternoon project and a service call.
Affordable Air has served as a go-to local HVAC resource for homeowners in Heber Springs, AR for years, and everyone on our team stays current on the latest industry standards. That history matters when we’re inspecting coils, because we know exactly how much pressure a fin can take before it collapses. We use that experience to protect the investment homeowners have already made in their systems.
How Do We Know When A Coil Needs Professional Attention?
We look for buildup that goes beyond light dust, such as grease film, mold, or debris packed between fin rows. When cleaning tools alone won’t clear it safely, we step in rather than risk bent fins or reduced airflow. One homeowner once called us in the evening with a system that had suddenly stopped cooling well, and we traced the issue quickly back to a voltage problem at the street transformer rather than the coil itself. That kind of fast, accurate diagnosis is hard to replicate without professional tools and experience.
What Do Homeowners Gain By Hiring A Pro For Coil Cleaning?
We protect evaporator coil cleaning and condenser coil work with the right chemicals, rinse pressure, and technique. One customer told us we did an outstanding job maintaining an existing system, then later hired us again for a full new install, describing our work as consistently thorough both times.
Consider this simple breakdown:
DIY: Light dusting, visual inspection, and clearing debris around the outdoor unit are all reasonable homeowner tasks. These steps carry little risk and catch many problems before they grow.
Professional: Chemical cleaning, fin repair, and diagnosing airflow or voltage issues tied to poor cooling call for trained hands. We bring the tools and experience needed to handle these safely.
DIY: Light dusting, visual inspection, and clearing debris around the outdoor unit are all reasonable homeowner tasks. These steps carry little risk and catch many problems before they grow.
Professional: Chemical cleaning, fin repair, and diagnosing airflow or voltage issues tied to poor cooling call for trained hands. We bring the tools and experience needed to handle these safely.
We recommend homeowners handle the light work and let us clean AC coils thoroughly each season.
Ready To Restore Your AC’s Performance?
Keeping your evaporator coil clean directly impacts your AC system’s efficiency and your home’s comfort. Regular maintenance prevents the buildup that forces your unit to work harder and costs more to operate. By prioritizing this essential service, you protect your investment and help ensure reliable cooling when you need it most. We invite homeowners throughout Heber Springs, AR to reach out to Affordable Air whenever they’re ready for professional coil cleaning and dependable HVAC guidance.
FAQ
Why does a dirty evaporator coil reduce AC efficiency?
Dirt and debris on the coil block heat transfer, forcing the refrigerant to struggle absorbing heat. This makes the system run longer, cool weaker, and raise energy bills.
What signs indicate a coil needs cleaning?
Warm air from vents, longer run cycles, and higher electric bills despite normal usage signal restricted airflow across a grimy coil. A visual inspection confirms buildup before it causes bigger repairs.
What should homeowners do before cleaning the coil themselves?
Homeowners should shut off power to the outdoor unit at the disconnect switch or breaker, then remove the protective panel to expose the coil. Taking these two steps first protects against electrical shock and keeps the fan from starting unexpectedly.




 100% Guarantee. If you aren't happy, we will keep coming back until you are.